


Top 5 Underwater Photography Tips
1. Know topside photography principles first
Whether you’re over or under the water, the basic principles of photography stay the same. However, taking your camera under water adds a few additional challenges, so it’s best to have a handle on the basics first, then add the layers of underwater complexity on top.
2. Be comfortable in the water
As a snorkeller or a SCUBA diver, you’ll know that once you get into the water you have lots to think about – handling the camera, thinking about settings and concentrating on your shots can sometimes distract you from the business of diving. If you’re new to the water, or returning to the water after an absence, it’s probably good to have a dive without your camera in preparation. If you are a SCUBA diver, one of the most critical skills an underwater photographer can have is excellent buoyancy control.
3. Get close to your subject
Water does two (main) things that effect photographs… it filters the warm colours out of light, and it holds particles in suspension that can degrade the image. So, the less water between the lens and subject, the better your pictures will be. Two styles of underwater photography are very popular… close-ups and; wide-angle, scenic shots. Both these styles of photography offer small camera to subject distances, so you end up with the least amount of water possible between your lens and the subject.
4. Let the critters come to you
The best encounters come when you slow down, relax. You’ll gain the animal’s trust and they are more likely to share their personal space with you.
5. Learn to use natural light
Light reveals the beauty of the ocean and the creatures within it. Aquatic textures, sun rays and unending shades of blue are what adds emotion to your shots and capturing the light with its many moods creates images that connect the viewer with the ocean. Adding artificial light is a necessity at times–to bring out colours at depth and, at night, and for small critters–so it’s good to add that skill to your toolbox once you’ve mastered available light.
5 pieces of kit to consider having in your topside bag on a Great Barrier Reef Cruise
Apart from your camera and lens, here’s a few items that will make Your Great Barrier Reef cruise a photo adventure!
1. Polarising Filter
A polarising filter cuts through reflections on non-metallic surfaces. It enables you to see through the surface of the water, and it takes away the shine off vegetation allowing the true colours to show through and increasing apparent colour saturation. It also cuts through atmospheric haze, making the sky look a darker shade of blue.
2. Waterproof Backpack
Loading in and out of open boats, shooting near the shoreline and in the sand are potentially dangerous locations for camera gear. A waterproof backpack (or a dry bag for your normal camera bag) can be good insurance!
3. Lens cleaning kit, blower brush & microfibre towel
Salt spray isn’t the best friend of your camera and lenses. Having a cleaning kit handy is recommended.
4. Spare Battery and Memory Card
Nothing worse than the shot that got away! A spare battery and an extra memory card will ensure you don’t miss any amazing great Barrier Reef encounters.
5. Camera Support
Depending on your camera… be it a phone, compact, mirrorless or a DSLR, some form of camera support will help you achieve better pictures, especially in low-light situations. Small plastic tripods are a good addition for smaller cameras–if you have a larger camera and you’re interested in getting creative with long exposures in low light, then a sturdier version might be on your list.
Image Details:
-
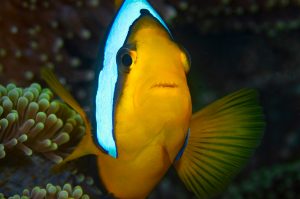
- Anemonefish- Adding artificial light is helpful in close-up photography.

-
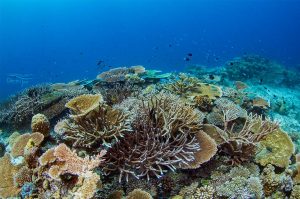
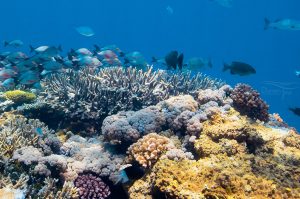
- Coral shots: Getting close to your subject helps with bringing out the colour in shallow reef scenes.

-
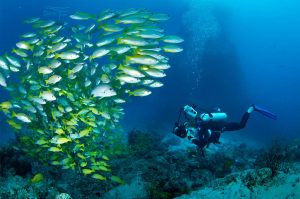
- Diver with camera: Being comfortable in the water and having good buoyancy control are essential ingredients for underwater photography.

-
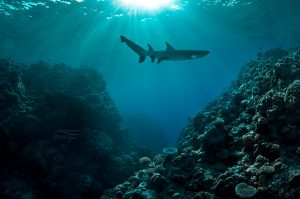
- White-tipped reef shark: Mastering available light helps create mood in your underwater photos.

-
- Diver with camera: Being comfortable in the water and having good buoyancy control are essential ingredients for underwater photography.

-

- Lizard Island pic: A polarising filter will add vibrancy to your reef and island scenes.

> Darren will be joining us on the Outerknown Adventures of the Great Barrier Reef cruise departing Cairns 18th November 2020